Elementor is a powerful and intuitive drag-and-drop page builder for WordPress. Understanding its interface will help you create and customize your web pages with ease. Here’s a detailed overview of all the elements in the Elementor interface:
1. Elementor Panel (Left Sidebar)
The Elementor Panel is where you will find all the tools and settings to build and customize your page. It is divided into several sections:
Widgets Tab
This tab contains all the elements (widgets) you can use to build your page. Widgets are grouped into categories:
Basic Widgets:
Heading: Add and style headings.
Image: Insert images from your media library.
Text Editor: Add and format text with a visual editor.
Video: Embed videos from YouTube, Vimeo, or upload your own.
Button: Add customizable buttons.
Divider: Insert horizontal dividers to separate sections.
Spacer: Add empty space between elements.
Google Maps: Embed Google Maps.
Icon: Insert and customize icons.
Image Box: Combine images and text.
Pro Widgets (available in Elementor Pro):
Forms: Add and customize forms.
Slides: Create image sliders.
Posts: Display blog posts dynamically.
Portfolio: Showcase a portfolio of work.
Pricing Table: Create pricing tables.
General Widgets:
Columns: Structure your layout with columns.
Tabs: Add tabbed content.
Accordion: Add expandable/collapsible sections.
Progress Bar: Display progress bars.
Testimonial: Add customer testimonials.
Social Icons: Insert social media icons.
Theme Elements (for customizing theme parts):
Site Logo: Display the site logo.
Site Title: Show the site title.
Page Title: Display the current page title.
Menu: Add a navigation menu.
Search Form: Insert a search bar.
Post Title: Show the title of the current post.
Post Content: Display the content of the current post.
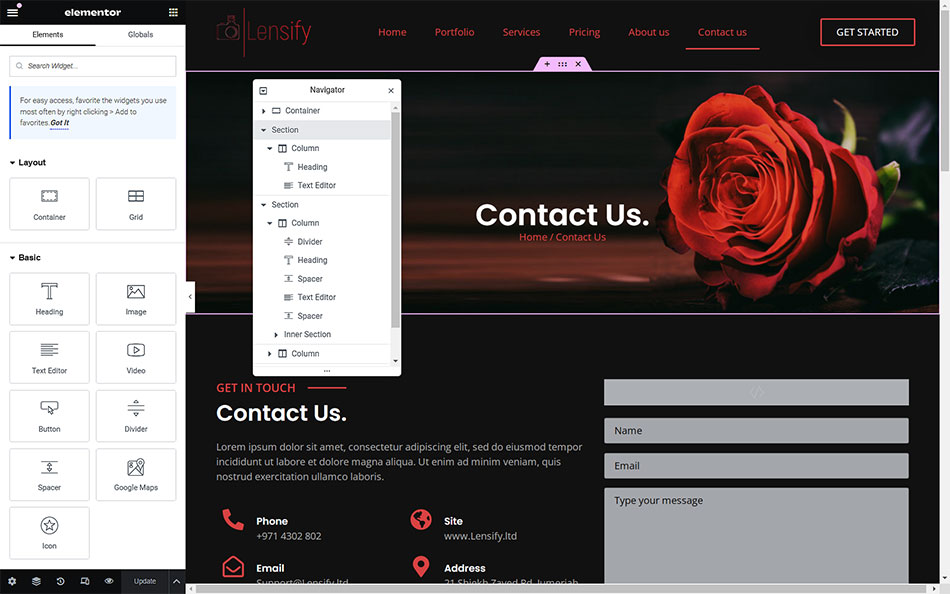
Navigator
Navigator: A tree view of all the sections, columns, and widgets on your page, allowing you to easily navigate and manage your content structure.
History
History: Track all your changes with a complete revision history. You can revert to any previous state of your design.
Responsive Mode
Responsive Mode: Preview and customize your page for different devices (desktop, tablet, mobile) to ensure a responsive design.
2. Page Preview (Right Panel)
The Page Preview is where you see your live page and can interact with it in real-time. Here you can directly add, edit, and customize elements:
Sections and Columns
Sections: The largest building blocks of your page. Sections can contain multiple columns and are used to group content.
Columns: Subdivisions within sections that help organize and structure content. You can drag and drop widgets into columns.
Contextual Editing
Inline Text Editing: Click directly on text elements to edit them inline.
Widget Context Menus: Right-click on any widget to access context menus for quick actions like copy, paste, delete, and duplicate.
3. Top Bar
The Top Bar provides additional controls and settings for managing your page:
Page Title: Displays the title of the current page you are editing.
Add New Section (+ icon): Quickly add a new section to your page.
Settings (Gear icon): Access page settings, including layout, style, and advanced options.
Preview Changes (Eye icon): Preview your page to see how it looks on the front end.
Publish/Update (Green button): Save and publish your changes.
4. Settings Panel
The Settings Panel appears when you click the gear icon in the bottom-left corner of the Elementor Panel:
Page Layout: Choose from various page layout options (e.g., Default, Full Width).
Hide Title: Toggle to hide or show the page title.
Preview Settings: Set the preview mode for different devices.
Status & Visibility: Manage the visibility and publish status of the page.
By familiarizing yourself with these elements, you’ll be able to take full advantage of Elementor’s capabilities, creating stunning and responsive web pages with ease.
Additional Resources
To learn more about Elementor Web Page Builder, refer to the following resources: