cPanel provides a robust set of tools for creating and managing email accounts associated with your domains. This guide will walk you through all the essential tasks related to email management in cPanel, including creating email accounts, setting quotas, setting up forwarders, configuring spam filters, and more.
1. Accessing Email Management Tools in cPanel
Login to cPanel:
Visit your cPanel login URL, typically https://yourdomain.com/cpanel.
Enter your username and password.
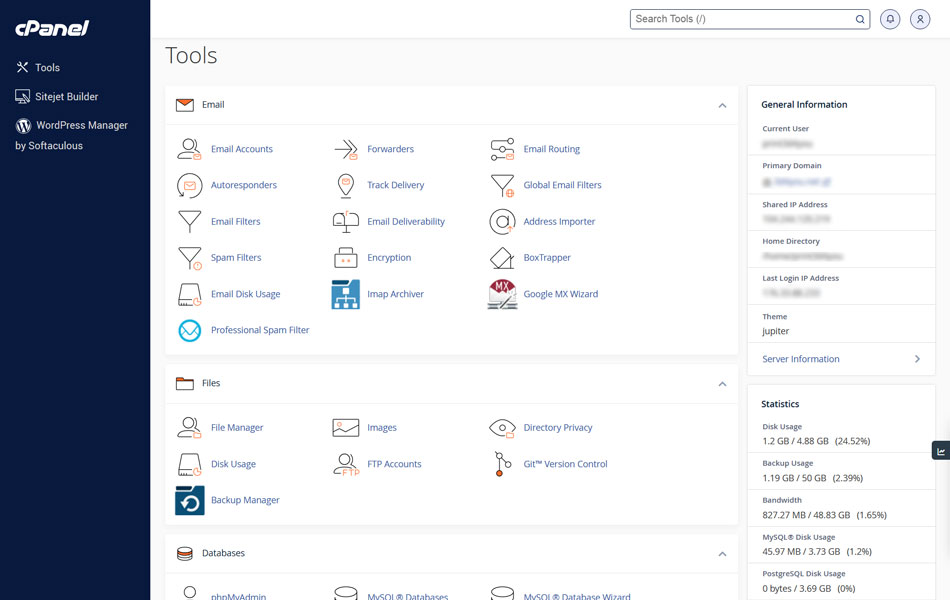
Click “Log in” to access the cPanel dashboard.
Navigate to Email Section:
Once logged in, look for the Email section on the main cPanel dashboard. This section contains all the tools you’ll need to manage your email accounts.
2. Creating and Managing Email Accounts
Creating an Email Account
Open Email Accounts:
In the Email section, click on Email Accounts.
Add Email Account:
Click the Create button.
Fill in the required details:
Domain: Select the domain for the email account.
Username: Enter the desired email address prefix (e.g., user for [email protected]).
Password: Enter and confirm a strong password or use the password generator.
Storage Space (Quota): Set the quota for the email account. You can specify a custom amount of storage space (in MB) or select Unlimited.
Click Create to set up the account.
Managing Email Accounts
View Existing Accounts:
In the Email Accounts page, you’ll see a list of all existing email accounts.
Modify an Account:
Click Manage next to the account you want to modify.
You can update the password, adjust the mailbox quota, and manage other settings.
Click Update Email Settings to save changes.
Delete an Account:
Click Delete next to the account you want to remove.
Confirm the deletion to remove the email account and all its data.
3. Setting Up Email Forwarders
Creating a Forwarder
Open Forwarders:
In the Email section, click on Forwarders.
Add Forwarder:
Click Add Forwarder.
Fill in the required details:
Address to Forward: Enter the email address you want to forward (e.g., [email protected]).
Destination: Enter the email address to which emails should be forwarded.
Click Add Forwarder to activate the forwarder.
Managing Forwarders
View Existing Forwarders:
In the Forwarders page, you’ll see a list of all existing forwarders.
Delete a Forwarder:
Click Delete next to the forwarder you want to remove.
Confirm the deletion to remove the forwarder.
4. Configuring Email Routing
Open Email Routing:
In the Email section, click on Email Routing.
Configure Email Routing:
Select the domain you want to configure.
Choose the appropriate routing option:
Local Mail Exchanger: Use this if the domain’s email is hosted on the same server.
Remote Mail Exchanger: Use this if the domain’s email is hosted on a different server.
Click Change to save the settings.
5. Setting Up Autoresponders
Creating an Autoresponder
Open Autoresponders:
In the Email section, click on Autoresponders.
Add Autoresponder:
Click Add Autoresponder.
Fill in the required details:
Email: Select the email account.
From: Enter the name to show in the response.
Subject: Enter the subject of the autoresponse email.
Body: Write the message body.
Start and Stop: Set the time frame for the autoresponder.
Click Create/Modify to activate the autoresponder.
Select the domain for which you want to configure the default address.
Choose how to handle unrouted emails:
Discard: Discard the emails.
Forward to Email Address: Forward unrouted emails to a specified address.
Click Change to save the settings.
7. Configuring Spam Filters
Open Spam Filters:
In the Email section, click on Spam Filters.
Enable Spam Filters:
Toggle the switch to enable spam filters.
Adjust Spam Threshold:
Adjust the spam threshold to determine what qualifies as spam. Lower numbers are more aggressive in filtering.
Additional Settings:
Configure additional settings such as automatically deleting spam or moving spam to a specific folder.
8. Ensuring Email Deliverability
Open Email Deliverability:
In the Email section, click on Email Deliverability.
Check Domain:
Select the domain you want to check.
cPanel will analyze your email deliverability and suggest fixes for issues such as missing SPF, DKIM, or DMARC records.
9. Creating and Managing Email Filters
Creating an Email Filter
Open Email Filters:
In the Email section, click on Email Filters.
Add Filter:
Select the email account you want to create a filter for.
Click Create a New Filter.
Define the filter rules and actions.
Click Create to save the filter.
Managing Filters
View Existing Filters:
In the Email Filters page, you’ll see a list of existing filters for each email account.
Edit or Delete Filters:
Click Edit to modify a filter.
Click Delete to remove a filter.
10. Monitoring Email Disk Usage
Open Email Disk Usage:
In the Email section, click on Email Disk Usage.
Check Disk Usage:
Select the domain and email account you want to check.
View the disk usage details and take necessary actions to free up space if needed.
Managing your email accounts in cPanel is straightforward with the comprehensive set of tools available. By following this guide, you can efficiently create and manage email accounts, set quotas, set up forwarders, configure spam filters, and much more. If you need further assistance, our support team is always here to help.