Setting up your WooCommerce pages correctly within Elementor’s site settings ensures that your store functions seamlessly and maintains a consistent design. This guide will walk you through the steps to set WooCommerce pages from within Elementor.
Step-by-Step Guide to Set WooCommerce Pages in Elementor
1. Accessing Elementor Site Settings
Edit Any Page with Elementor:
Go to your WordPress dashboard.
Navigate to Pages > All Pages.
Choose any page you want to edit and click on Edit with Elementor.
Open Site Settings:
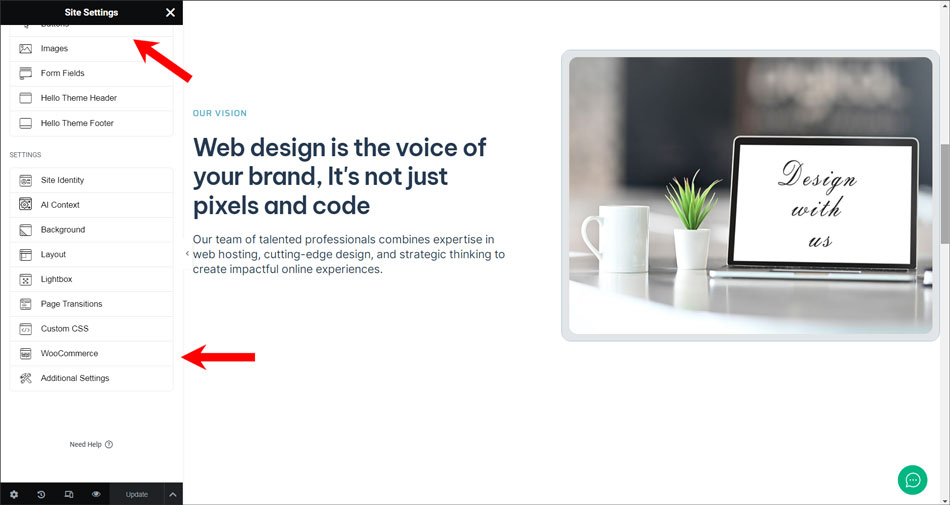
Once in the Elementor editor, click on the menu icon (three horizontal lines) at the top left corner of the Elementor panel.
Click on Site Settings. This opens a panel where you can manage global site settings for your website.
2. Setting Up WooCommerce Pages
Elementor allows you to set WooCommerce pages directly from the Site Settings panel. Here’s how you can assign the necessary WooCommerce pages:
Navigate to WooCommerce Settings in Elementor:
In the Site Settings panel, click on WooCommerce.
Then click on WooCommerce Pages.
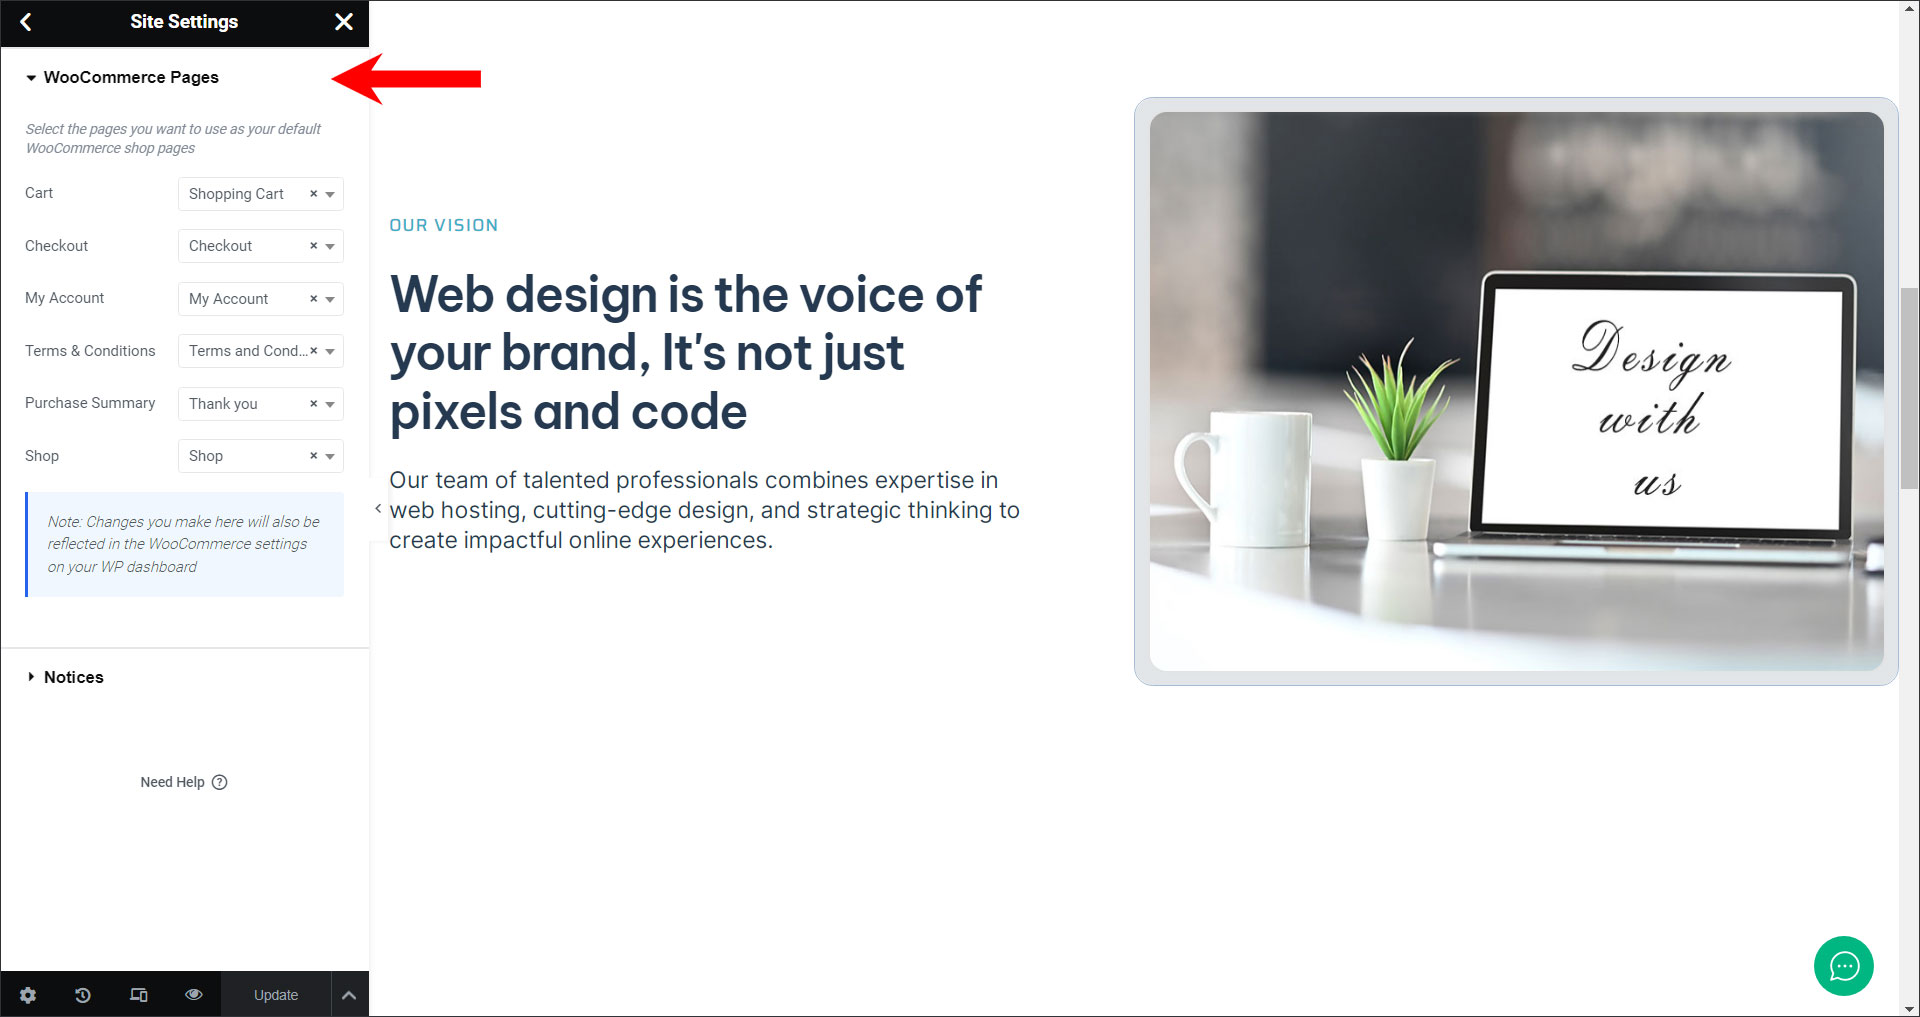
Assign WooCommerce Pages:
Cart Page: In the field labeled “Cart Page,” type the name of the page you’ve designated as your Cart page. Wait for less than a second, and Elementor will search and display a list of pages that match the name you’ve typed. Select the appropriate page from the list.
Checkout Page: In the field labeled “Checkout Page,” type the name of your Checkout page. Again, wait for a moment for Elementor to search and show a list of matching pages. Select the correct page from the list.
My Account Page: In the field labeled “My Account Page,” type the name of your My Account page. Wait briefly, then choose the correct page from the list that appears.
Terms and Conditions Page: If you have a terms and conditions page, type its name in the “Terms and Conditions Page” field. Wait for Elementor to search and show the matching pages, then select the correct one.
Purchase Summary Page: The Purchase Summary page displays a summary of a customer’s order after they complete a purchase. Type the name of your Purchase Summary page in the “Purchase Summary Page” field, wait for Elementor to search, and select the appropriate page from the list.
Shop Page: In the field labeled “Shop Page,” type the name of the page you want to set as your Shop page. Wait for Elementor to search and show the matching pages, then select the correct one.
3. Save Your Changes
Click update button once you have assigned all the necessary pages:
Save Settings:
Click the green Update button at the bottom of the Site Settings panel to save your changes.
Additional Tips for Customizing WooCommerce Pages
Edit with Elementor:
To further customize these pages, you can edit each one directly with Elementor. Navigate to Pages > All Pages, find the page you want to customize (e.g., Cart, Checkout, My Account, Purchase Summary, Shop), and click Edit with Elementor.
Use WooCommerce Widgets:
Utilize Elementor’s WooCommerce-specific widgets to add and customize elements on your pages. Widgets like Cart, Checkout, My Account, Order History, Purchase Summary, and Product Categories can help you build a functional and visually appealing layout.
Ensure Mobile Responsiveness:
Switch to mobile view in the Elementor editor to ensure your pages look great on all devices. Adjust layout, fonts, and spacing as needed for mobile optimization.
Test Functionality:
Before finalizing your changes, thoroughly test each page to ensure all elements function correctly. Check the user experience from adding products to the cart to completing the checkout process.
By following these steps, you can effectively set up and customize your WooCommerce pages using Elementor, ensuring a cohesive and user-friendly shopping experience for your customers. This setup not only enhances the visual appeal of your store but also improves its functionality, leading to higher customer satisfaction and increased sales.